


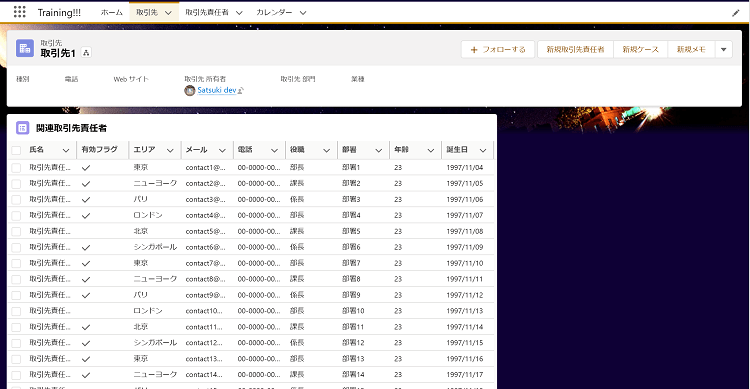
今回は、Auraコンポーネントのlightning:datatableタグを使用して下記のようなシンプルな関連リストを作成してみました。
コンポーネントのlightning:datatableタグ内には、data、columns、keyFieldを設定します。
dataにはdatatableに表示するレコードが入り、columnsにはContactListHelper.jsで設定したカラム名が入ります。
keyFieldはそれぞれのレコード列をユニークに特定するためのものです。
<aura:component controller="ContactList" implements="force:appHostable,flexipage:availableForRecordHome,force:hasRecordId" access="global" >

    <aura:attribute name="recordId" type="Id"/>
    <aura:attribute name="conList" type="contact[]" />
    <aura:attribute name="mycolumns" type="List"/>

    <aura:handler name="init" value="{!this}" action="{!c.doInit}"/>

    <lightning:card class="card" iconName="standard:contact_list" title="関連取引先責任者">
        <lightning:datatable data="{! v.conList }"
                             columns="{! v.mycolumns }"
                             keyField="id"
                            />
    </lightning:card>
</aura:component>
doinitメソッドはコンポーネントのaction=”{!c.doInit}”から呼び出されます。
今回は、カラム取得とレコード取得に処理を分けてさらにヘルパークラスの処理を呼び出しています。
(処理の煩雑化防止のため、具体的な処理はできるだけヘルパーに書こうと思います)
({
    doInit : function(component, event, helper) {
        helper.getColumn(component);
        helper.getContact(component);
    }
})
ContactListHelper.jsでは、カラム設定とレコード取得を行っています。カラム設定では、指定した値をコンポーネントのmycolumnsに設定します。レコード取得に関しては、component.get(“c.getContact”)でサーバ側のApexクラスを呼び出しています。この時、引数として現在表示している画面のレコードId(取引先Id)を渡します。action.setCallbackの部分はサーバ側とクライアント側のコントローラの接続がうまくいっているかの確認のようなものだと思います。問題なければ、$A.enqueueAction(action)で実際に処理が実行されます。
({
    getColumn:function(component){
        component.set('v.mycolumns', [
            {label: '氏名',  fieldName: 'Name'},
            {label: '有効フラグ', fieldName: 'IsActive__c', type: 'boolean'},
            {label: 'エリア', fieldName: 'Area__c', type: 'pickList'},
            {label: 'メール', fieldName: 'Email', type: 'Mail '},
            {label: '電話', fieldName: 'Phone', type: 'Phone'},
            {label: '役職', fieldName: 'Title', type: 'text '},
            {label: '部署', fieldName: 'Department', type: 'text'},
            {label: '年齢', fieldName: 'Age__c', type: 'text'},
            {label: '誕生日', fieldName: 'Birthdate', type: 'date'},
        ]);
    },

    getContact : function(component) {
        var action = component.get("c.getContact");
        action.setParams({
            recordId:component.get("v.recordId")
        });
        action.setCallback(this,function(response) {
            var state = response.getState();
            if (state === "SUCCESS") {
                component.set("v.conList", response.getReturnValue());
            }
        });
        $A.enqueueAction(action);
    }
})
Apexクラスはクライアント側のコントローラ(今回は、ContactListHelper.js)から呼び出され、対象の取引先責任者レコードを取得し、そのリストを返します。@AuraEnabledアノテーションをメソッドの前に宣言することで、Lightning コンポーネントから Apex メソッドおよびプロパティへのアクセスが可能となります。また、サーバ側アクションはstaticメソッドで、globalまたは、publicを使用します。
public class ContactList {
    @AuraEnabled
    public static List<Contact> getContact(Id recordId){
         return [select Id, Name,IsActive__c, Area__c, Phone, Email, Age__c, Birthdate, Title, Department from Contact Where AccountId =: recordId];
    }
}
lightning:datatableを使用すると、簡単にレコードの一覧表示ができるので便利ですね。
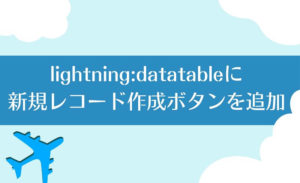
次は、今回作成した関連リストに取引先責任者の「新規作成」機能を実装してみようと思います。


コメント